When designers and developers are building websites for clients, it’s important to be conscious of how visitors will navigate through the site. By presenting the most helpful options at every touchpoint, designers and developers can provide an effortless user experience from start to finish.
Product pages can present unique opportunities and challenges in this context. While the main focus should be on the product, there’s also an opportunity to display and cross-sell complementary products.
You can make it easy for customers to continue shopping, and drive conversions for your clients by positioning recommended products in a visible and appropriate location on a product page. What can often be overlooked, however, is which products appear as recommended options.
In this post, we’ll be looking at how developers can leverage the Liquid recommendations object to provide clients with the ability to surface data-powered product recommendations on their product pages. I’ll also show you how to create a section that displays related products by tag, which will enable your clients to personalize their product recommendations.
The recommendations object
The recommendations object is a Liquid object which is used on product pages to output an automatically-generated list of related products. By using a data-driven approach to display suitable product recommendations, your clients can improve the discoverability of new products.
When a section is set up to use the recommendations object, it could look something like this:

There are three attributes associated with the recommendations object. The attribute that returns a list of product objects is recommendations.products. This can be used with the other two attributes, recommendations.performed and recommendations.products_count, to create the conditions to display a product list.
There are a number of factors that influence what products are displayed when using the recommendations object. Depending on your client’s the Shopify plan type, the number of products in stock, and the language of your client's store, there may be different products recommended.
These are the different types of recommendations that are outputted based on your client’s Shopify plan and store configuration:
- Purchase history and product descriptions: Available to those on the Shopify Plus plan who have <7000 products published in their online store, with an English storefront
- Purchase history only: Available to those on the Shopify Plus plan who have <7000 products published in their online store, with a non-English storefront
- Purchase history only: Those not on a Shopify Plus plan who have <7000 products published in their online store
- Collections: Available on any plan for merchants with >7000 products published in their online store
As new orders and product data become available, the product recommendations that appear will become more accurate.
Clients can also track how effective the product recommendations are at improving sales directly from the Analytics page in their Shopify admin. The Product recommendation conversion over time report displays a range of different metrics for understanding the performance of product recommendations.
For example, a client can view how often a product was purchased by a buyer after clicking on a product recommendation within a session, as well as the percentage of clicks on product recommendations that converted into purchases.
You might also like: How to Use Liquid to Create Custom Landing Page Templates.
Creating a product recommendations section
The first step to showing data-driven product recommendations on your client’s product pages is to create a new Liquid file within the /sections directory of the theme. We can call this product-recommendations.liquid.
The section will use a mixture of HTML, Liquid, and Javascript to render a list of products. Liquid allows us to set up the conditions for outputting the recommended products, while Javascript takes care of the heavy lifting by loading the products into the section.
In this case, the Liquid and HTML would look like this:
We can see here that we’re using the recommendations.products_count with control-flow tags to set up a condition to ensure the heading and list of products will only appear if there are products to recommend.
Below this we create a for loop with the recommendations.products to iterate over the current product’s associated recommended products, and output them. In this case, the limit of recommended products is set to 4, the value of the data-limit in the opening container tag.
It’s possible to increase the data-limit as the recommendation algorithm associates up to ten products per individual product, in order of relevance. However, if you want to promote only the most relevant recommendations, it’s advised that you show no more than four products per product page.
Next we can add the javascript to the section, contained within {% javascript %} section tags:
We’ve included comments with the code so you can see a description of what each function is performing. In essence, we are making a request to read the data of the container within the product recommendations section, and dynamically inserting the response's markup on the page.
Finally, to display the product recommendations on a product page, we need to include the section within the theme’s product.liquid file. We would generally add this below where the main content is being loaded, so your product.liquid file could look like this:
{% section 'product-template' %}
{% section 'product-recommendations' %}
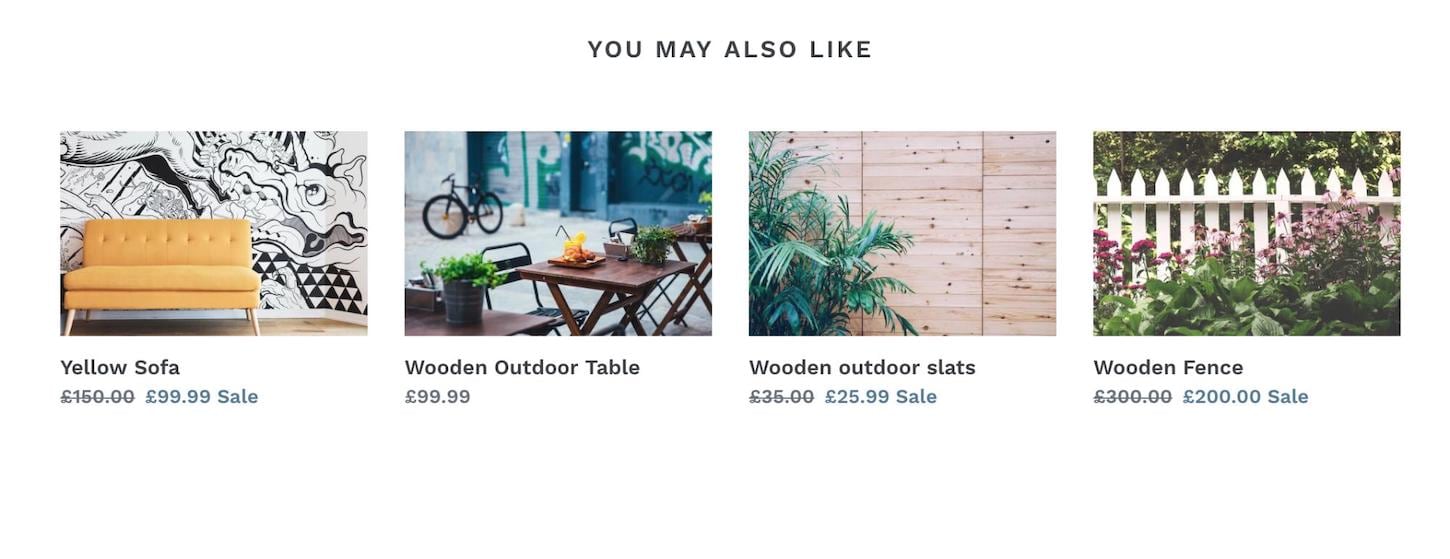
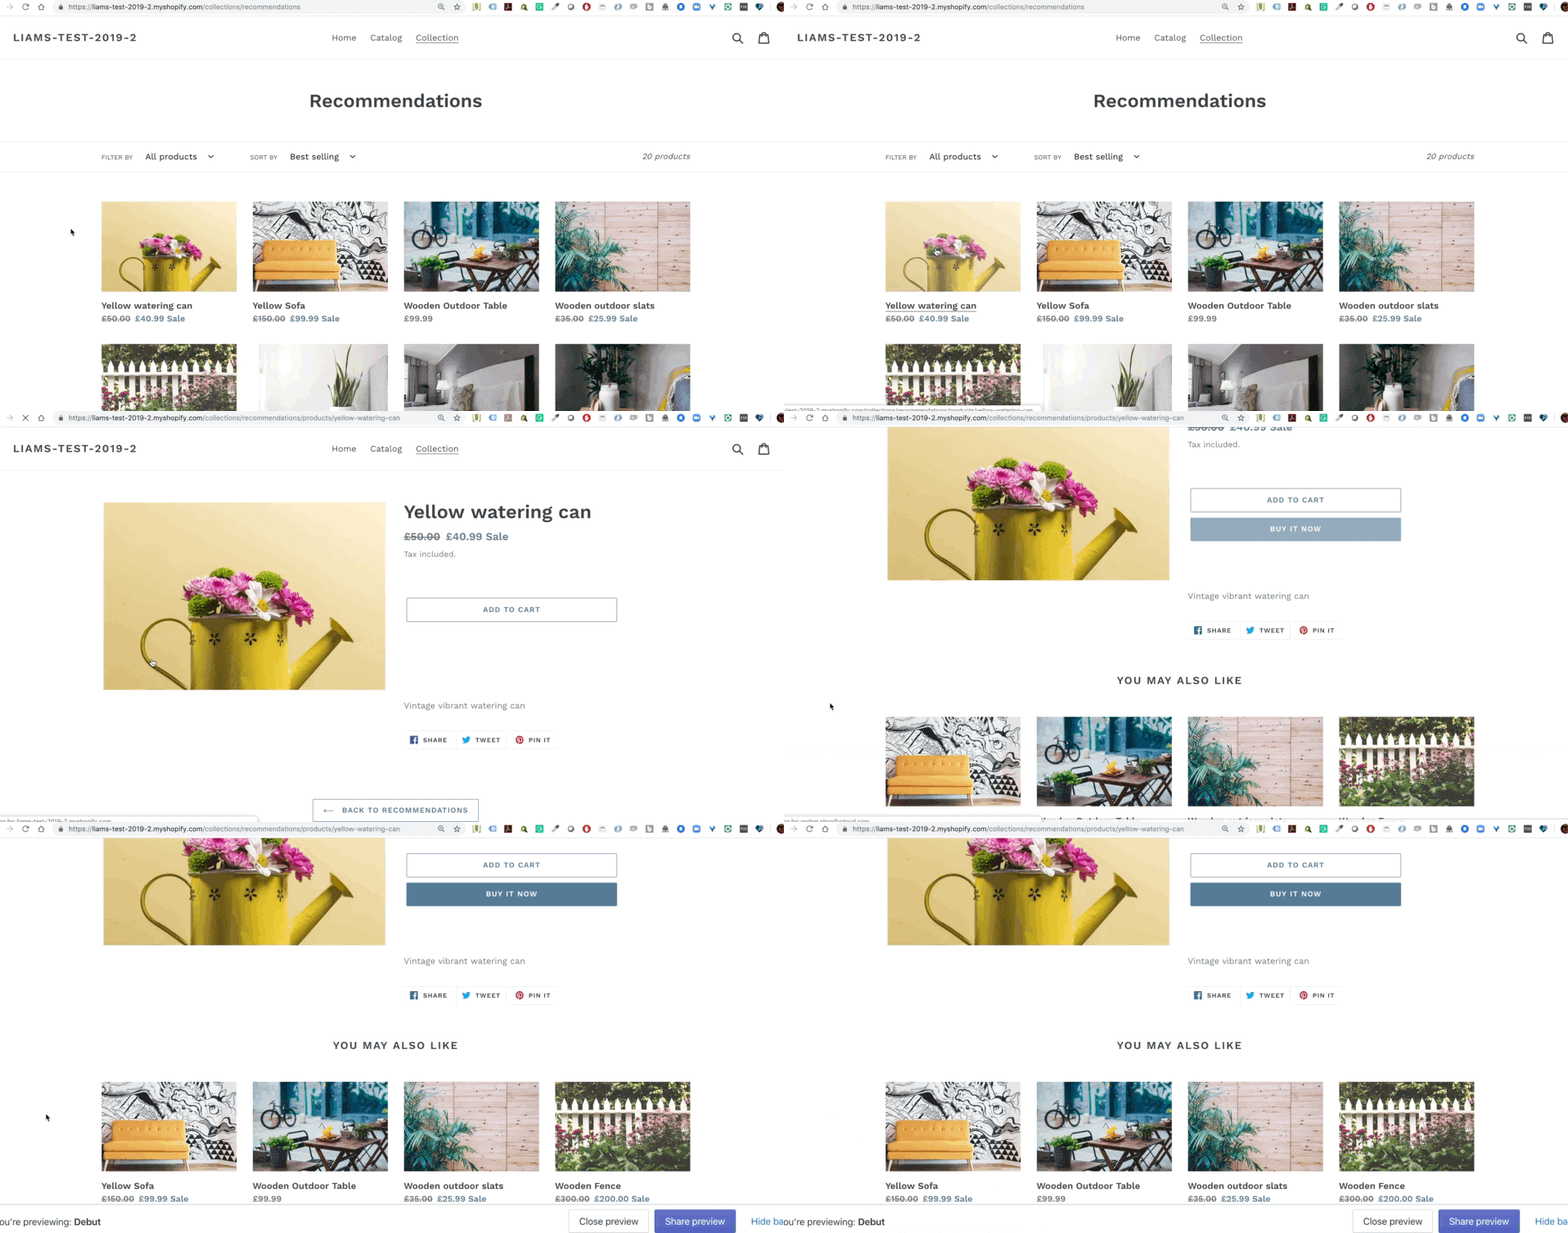
Now when you navigate to a product page, you will see a list of recommended products appearing based on purchase data, or within the same collection.

Expanding options with section settings
To empower clients to make adjustments to how this section appears, we can also go one step further with customizing this feature using section settings. For example, we can create section settings that enable or disable the section, and also allow your clients to edit the heading that appears above the recommended products.
To achieve this effect, we’d need to add {% schema %} tags to the section and use JSON to create settings and values. These settings would correspond with elements in the markup and allow clients to interact with them via the theme editor.
To turn the section on and off, we would wrap the product recommendations container in an if statement, which would be assigned an ID. This could look like:
{%- if section.settings.show_product_recommendations -%}
<code for section>
{% endif %}
The corresponding schema settings would be added within the section like this:
Similarly, we could create a section setting variable that targets the heading, and would appear within the markup like so:
<h2>{{ section.settings.heading }}</h2>
We want this to be an editable text box, so the corresponding schema settings would look like this:
Once this is all added in, the overall section would appear like this:
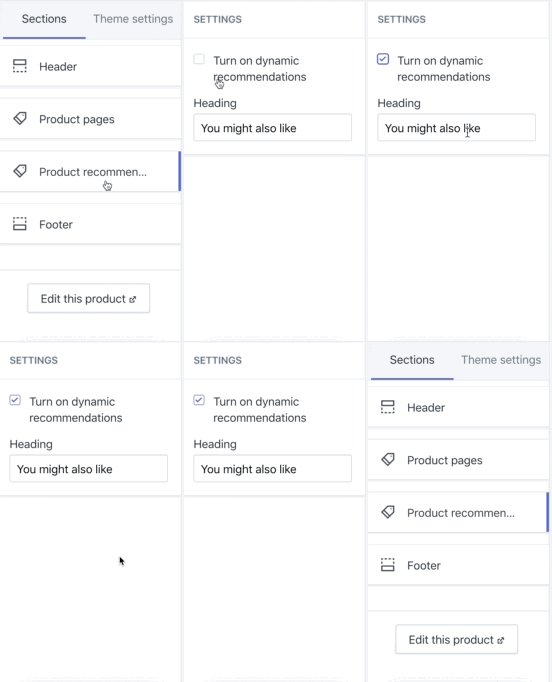
Now, when a client uses the theme editor and navigates to a product page, they would see options for editing the product recommendations section:

You might also like: Understanding Progressive JPEG and WebP Formats.
Creating a related products section based on grouping tags
If your client is looking to have manual control over which products appear as recommendations, there’s an alternative method you could implement that matches products by tag. Using Liquid to set up tag-based rules on different product templates means that your clients will be able to personalize which related products appear on their product pages.
Since this alternative method predates the introduction of the recommendations object, clients who use this method will not be able to take advantage of the analytics collected by the data-driven approach.
Also since this method involves searching through all products to find and display products that share a specific tag, there’s a performance cost associated with this lookup. For this reason, this solution is only advisable if your client needs to match specific products with each other.
The first step is to create a new blank section in your themes section folder. To keep it simple, we can name this section related-products-by-tag.liquid. Next, you will need to copy and paste the code from this gist into your new blank section:
With this method, the crucial actions are enacted by control flow tags on line 104, which create a condition based on a specified tag:
This means that any product that contains the tag of ’test’ will now be displayed on the product page as a related product. A client can change ’test’ to whichever tag they prefer, and alternative versions of this file can be created for each tag. You can learn how to create alternative product templates from our help docs.
Once this section is created, you will need to include it on the product.liquid template file, or your preferred alternative product.liquid template file. You can do this by adding{% section.related-products-by-tag.liquid %}
below where you see {% section 'product-template' %}.
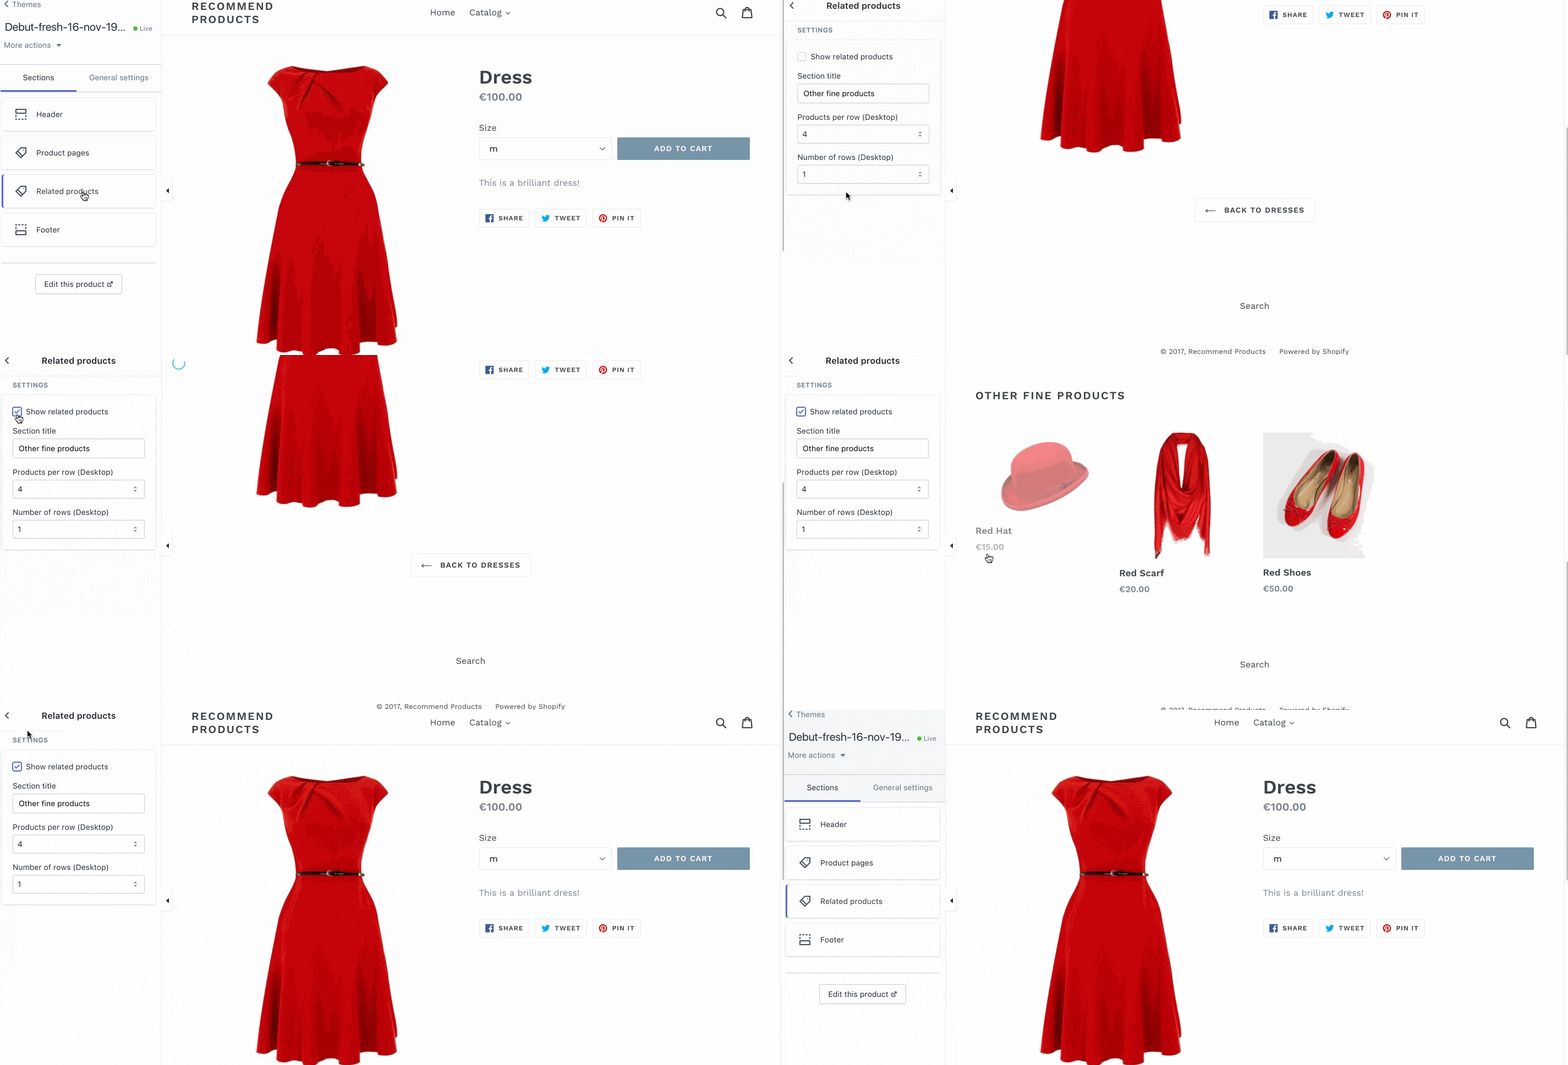
Now, when a product applies this template, you will see related products that contain the tag specified in the section’s code.

Smarter recommendations, better UX
Whichever method you implement, providing intuitive related products on your custom themes will give your clients a competitive edge when they need to direct customers to specific products.
By integrating recommendations for cross-selling, and considering the most appropriate approach, you can give your clients more opportunities to drive conversions, and improve the general usability of a site.
Read more
- How to Customize Content by Country with Shopify
- An Overview of Liquid: Shopify's Templating Language
- How to Build a Shopify App: The Complete Guide
- Introducing Online Store 2.0: What it Means For Developers
- How to Create a Sticky Add to Cart Button On Scroll
- Introducing BuyButton.js – Shopify's New JavaScript Library
- 5 Easy-to-Implement Website Maintenance Tips for Your Client's Ecommerce Business
- Free Webinar] Developing with Shopify: Using JavaScript to Add Ecommerce to Any Website
Have you experimented with different approaches when designing related products features? We would love to hear about your experiences in the comments below.

