 Thinking of how to expand your service offerings to your client? Why not make their Shopify store look awesome by taking their product photography? A lot of Shopify store owners don’t spend much time on their product photos or never move past using t-shirt mockup templates because they think it requires the skills of a professional photographer and a bunch of expensive equipment. Yet high quality product photos can give a Shopify store that extra professional touch and are the key to soaring ecommerce sales. Why not give it a go and become the expert product photographer your clients are searching for? Here are four tips on how to take great product photos.
Tip 1: Grab a camera (and learn to use it!)
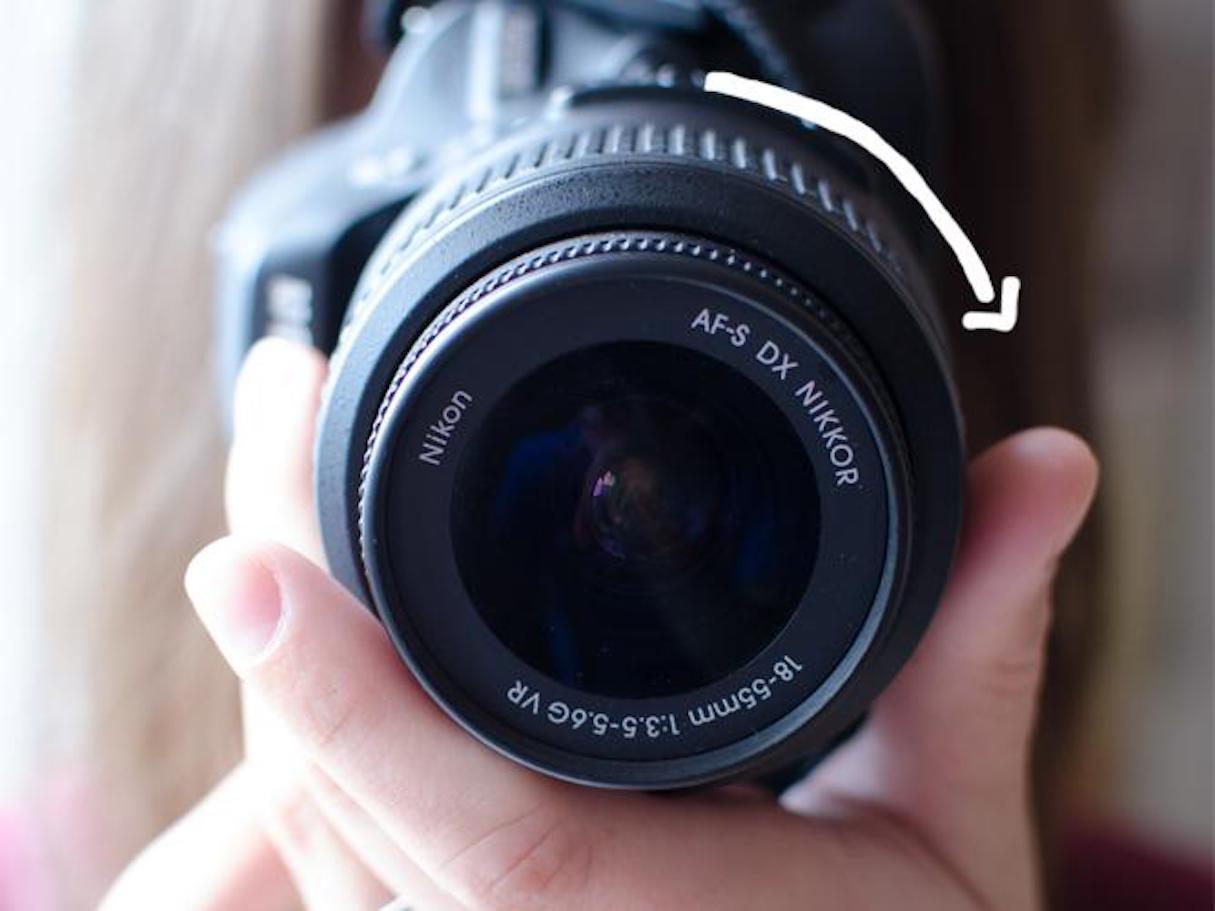
You don’t need the best, most expensive camera out there to take awesome product photos. A simple DSLR model with a kit lens (anything from the Canon Rebel series to an EOS 60D, or a Nikon D3200) will take incredible photos if you nail the setup and use it the right way.
The advantage of using a DSLR is that you can shoot manual, which will allow you to choose the optimal camera settings for product photography. Though the ideal settings will depend on your setup, a basic understanding of the following will allow you to make the adjustments that are necessary for the perfect shot.
Aperture
Aperture is the hole in the lens that controls the amount of light that travels into the camera, measured in f-stops. The confusing part is that the larger the f-stop number, the smaller your aperture. The aperture determines how bright your image is; the smaller the aperture, the darker the image. The aperture also determines how much of the product is in focus — a small aperture will capture everything clearly in the frame, whereas a large aperture will leave the edges of the product slightly blurred. You want a well-lit, well-defined product so you need to find an aperture that’s small enough to capture the entire product clearly, and large enough to give you a bright photo. I like to start with f/8 and go from there.
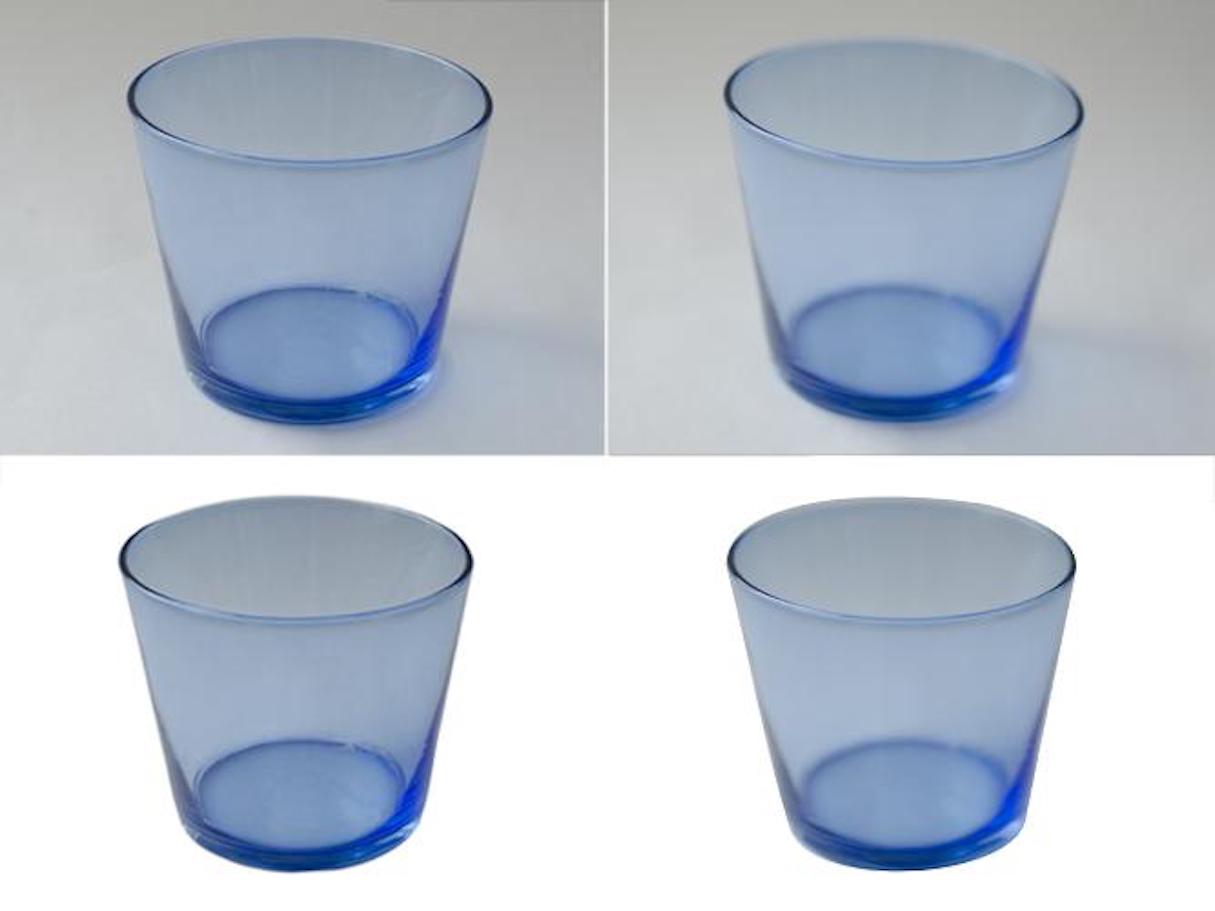
If you take a look at the photos below, the left was taken with an aperture of f/10 and the right with an aperture of f/1.8. You can see that the entire cup is in focus in the left photo, whereas only the centre of the cup is in focus in the right photo. Note that the shutter speeds were adjusted to the apertures to show the change in depth of field.
Shutter speed
Shutter speed refers to how long the shutter is open for. You’d think that the shutter speed wouldn’t matter when shooting still objects, but if you’re working with a small aperture, you’ll need a slower shutter speed so that the camera can let in light for a longer period of time.
Both of the photos below were taken with an aperture of f/10, but the shutter speed was set to 1/50 and 1/320 respectively. You can see that the 1/320 is much darker.

ISO
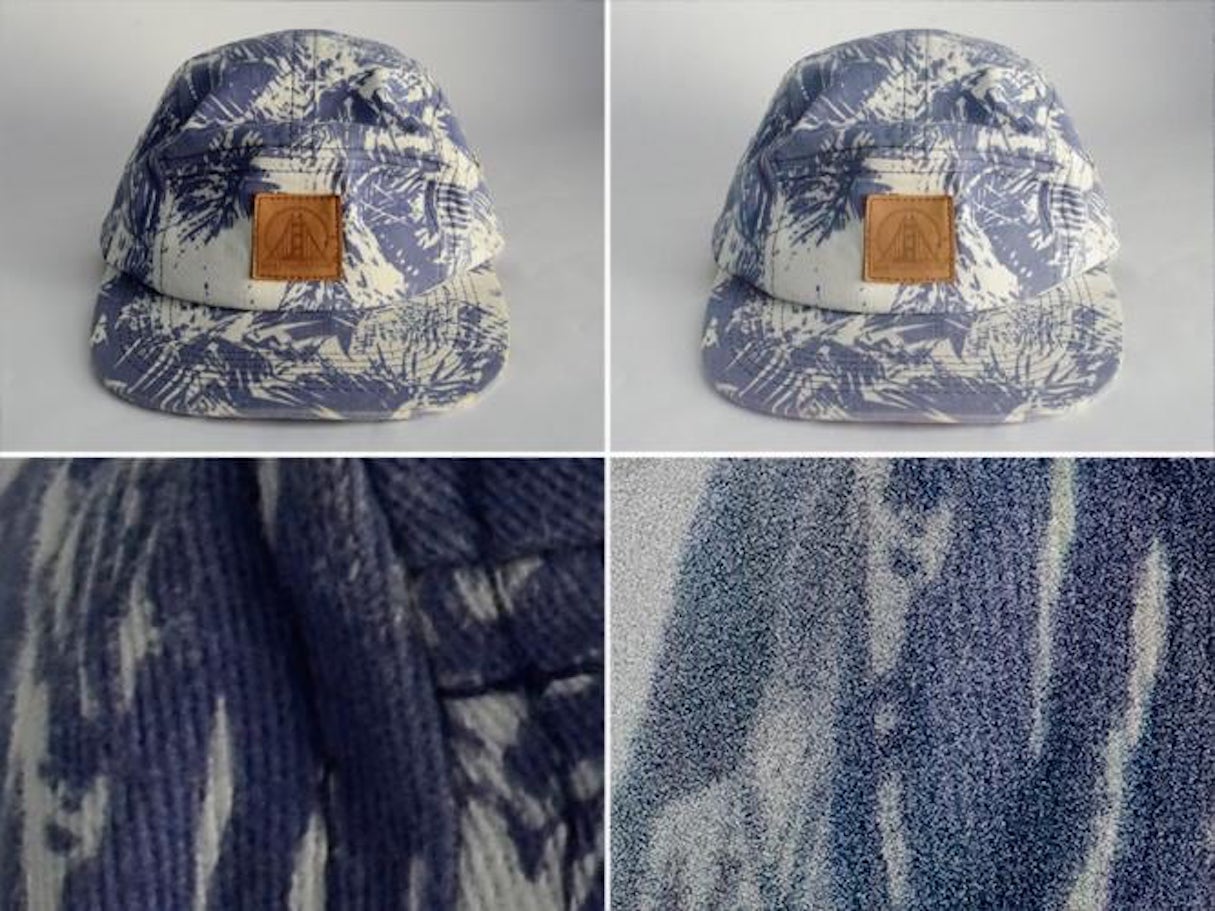
ISO is your camera’s sensitivity to light. Anything over 400 will give you images with ‘camera noise’, so keep the ISO low.
If you look at the photos of the hat below, you can really see the effect of a higher ISO when you zoom in.
You can also use a smartphone for product photography, although the results won't be as good. Newer smartphones have fantastic cameras that’ll take great shots if your studio is set up correctly.
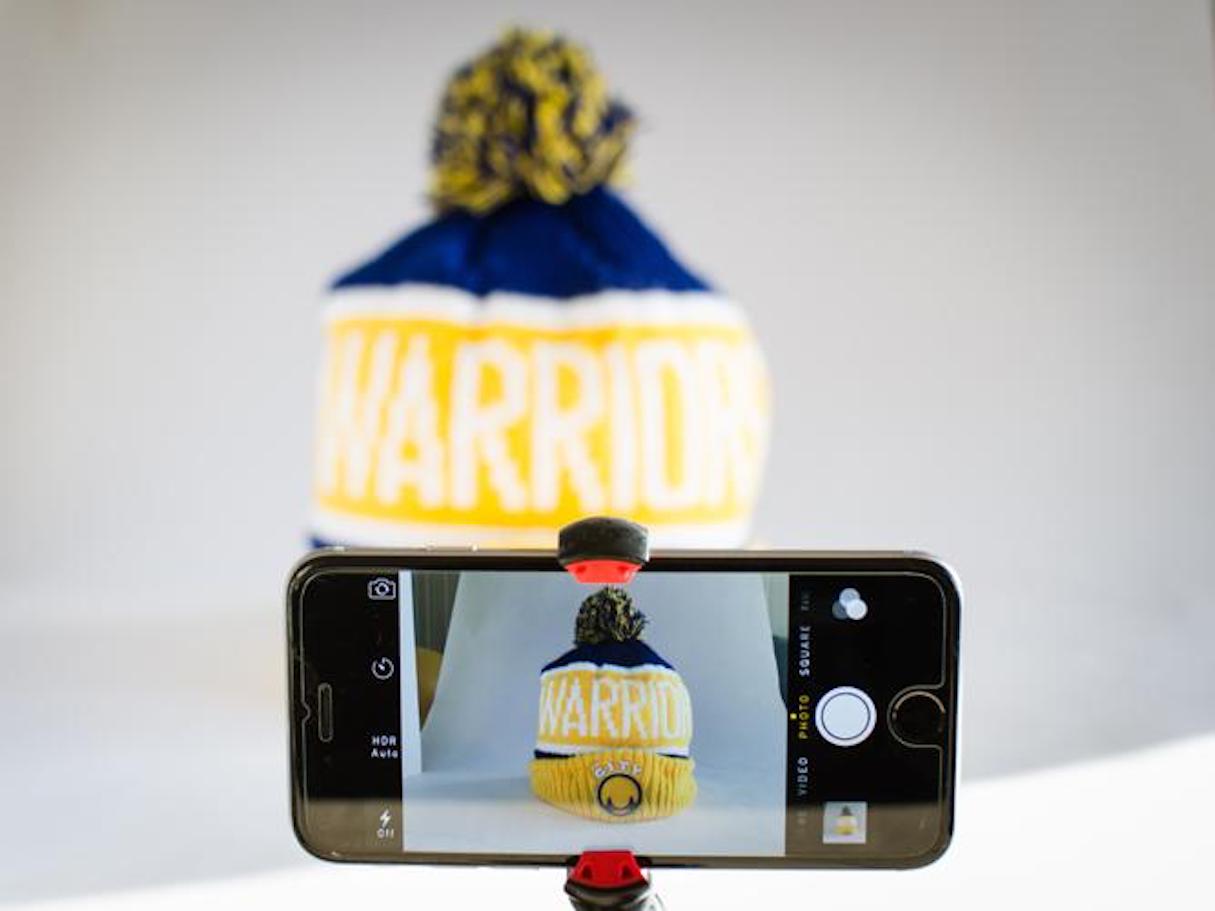
Although you can’t manipulate the settings as easily, you can get iPhone and Android apps that help you keep the ISO down.
You might also like: 10 Bookmark-Worthy Websites for Free Stock Photography.
Tip 2: Set up a white backdrop
Start by setting up a white backdrop. How you do this will depend on your budget; you could buy a professional photography sweep or create your own. The benefit of buying your own, especially one that comes with a stand, is that you can just whip it out whenever you shoot and you’re good to go.
If you create your own, you’ll need to find the right material to use and figure out a way to set it up. You can use anything from a clean white sheet to a roll of paper and the size you need will depend entirely on the size of the products you’re shooting. The backdrop needs to be larger than the product itself and long enough to seamlessly ‘sweep’ from the vertical to the horizontal surface so that you don’t get a harsh line where these two surfaces meet. You can fix the vertical surface to a wall with tape or drape it over/hang it off something.
There are a few reasons as to why you should shoot against a white backdrop. The first is that it’ll make your camera’s white balance calibration as accurate as possible. Your camera needs to adjust to the color temperature of the light sources that you use (as all light sources are different) and guess the true colors of the product based on a white element in the frame.
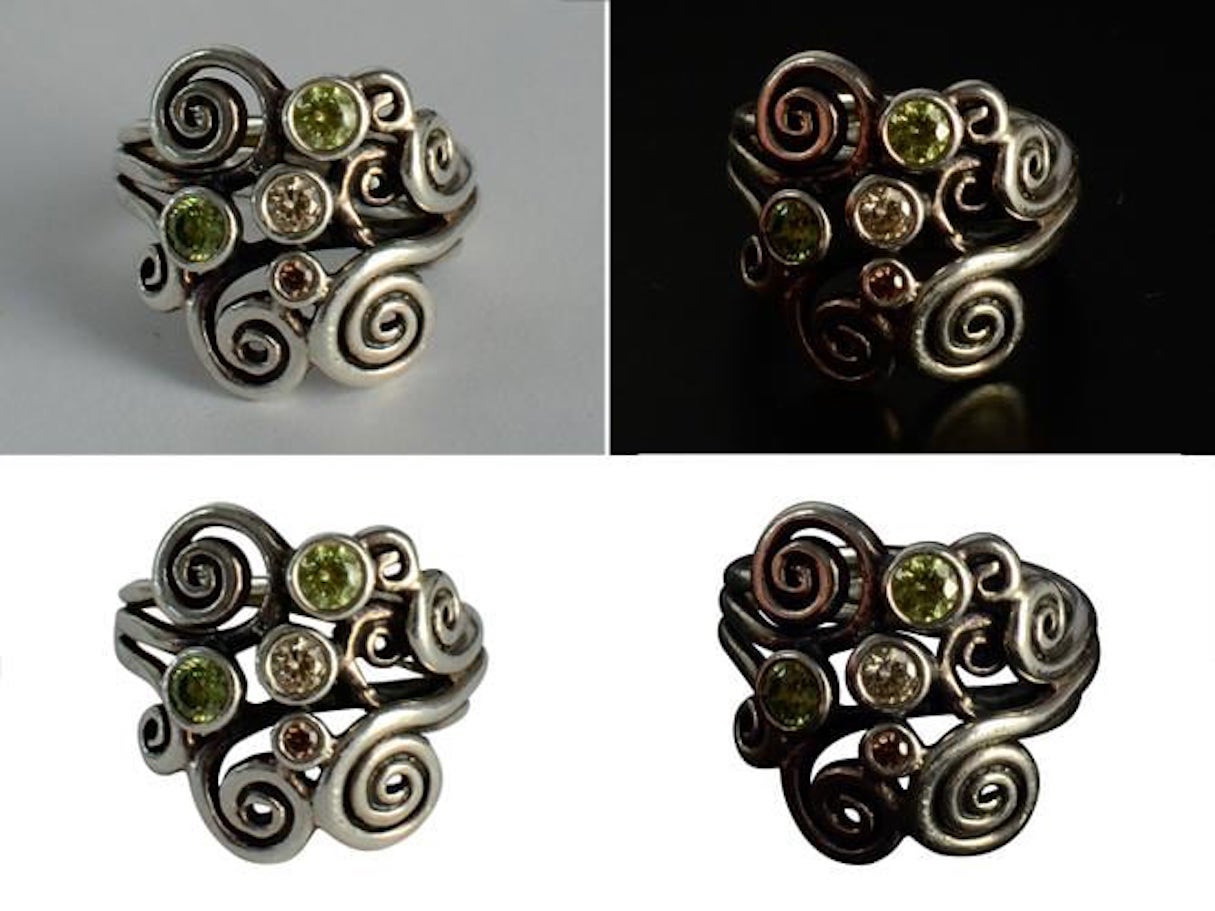
Secondly, the white will reflect light back onto your product and give you a well-lit photo with a nice brightness and contrast balance. Darker colors absorb the light, and the photo can end up looking overexposed. Other colors can result in color spills, particularly when you have a shiny and reflective product. If you look at the photos below, you can see that the ring looks much better in the photo taken on the white surface.
And finally, it’s much easier to edit photos that have been shot against a white backdrop if you choose to do so. If you want to know how to optimize these photos for your client’s ecommerce store, we give you a few tips in this blog post.
You might also like: 11 Inspirational Art and Photography Ecommerce Website Designs.
Tip 3: Use sufficient light sources
Good lighting is the secret behind great product photography.
Start by trying your hand at natural lighting. Find a spot near a window, as you’ll want to use indirect lighting. You’ll want the window to the left or right of your product, with the sweep at the back and the camera at the front. On the other side of your product, opposite the window, you’ll want to use some kind of a fill light in order to evenly light up the product and avoid harsh shadows. You can buy a professional photography reflector, or fold a piece of white card (the shinier, the better) in half and stand it up. You will need to play around the positioning of the fill light to see which angle works best.
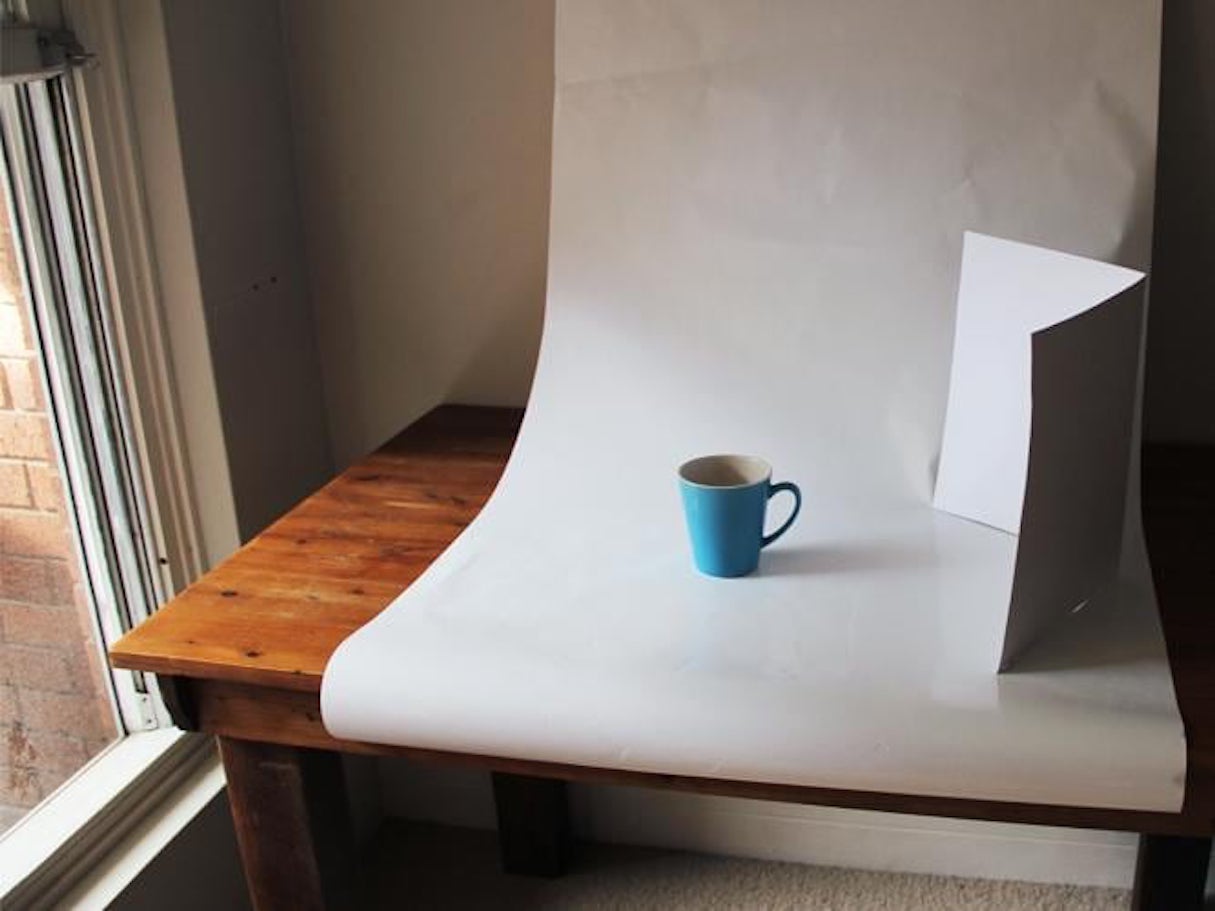
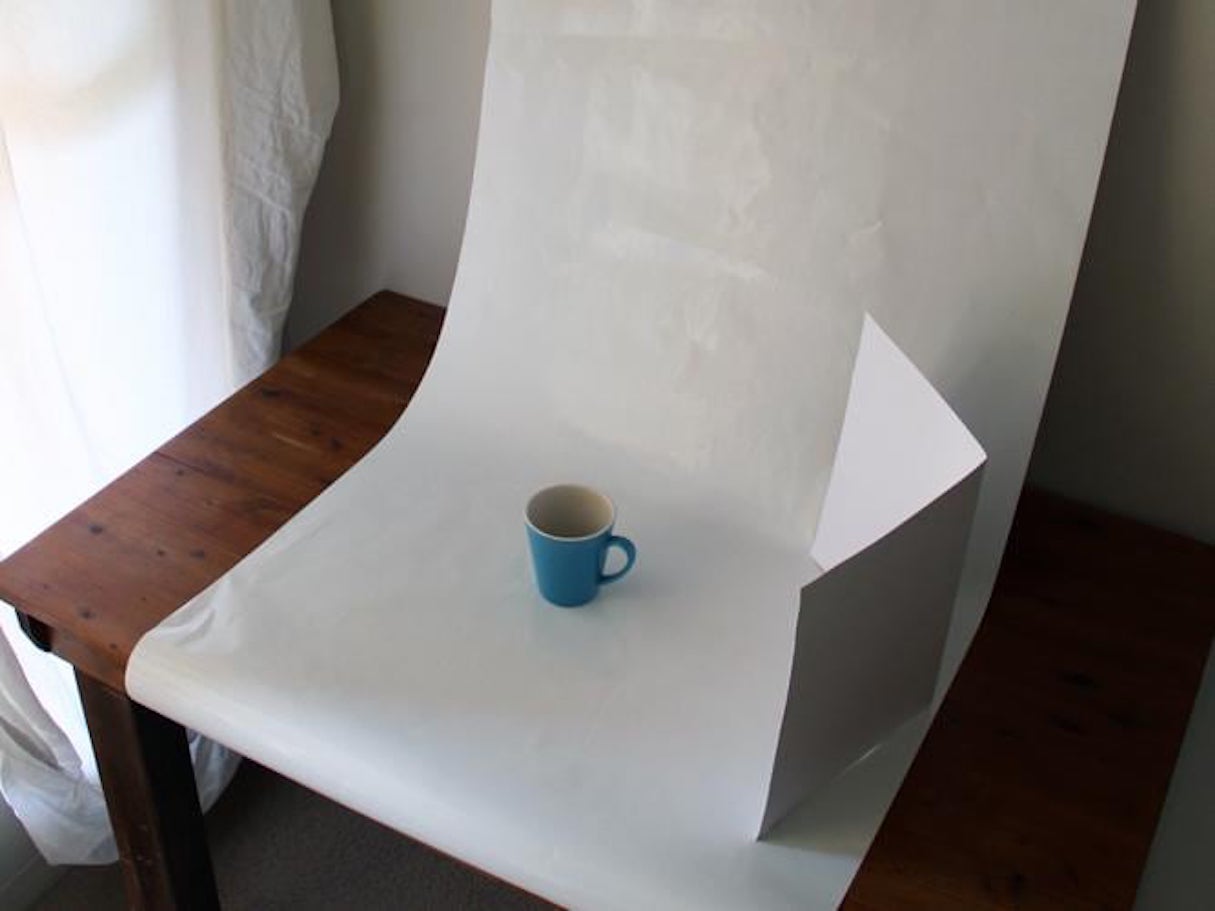
If you find that light coming from the window is too bright, you can diffuse it by covering the window with a white sheet, or taping over it with thin white paper.
Artificial lighting is a lot harder to work with and will cost more to set up. You will need a light on each side of the product, and a third light either behind and above or in front of and below the product. This third light will help give your product some dimension and light up the entire frame.
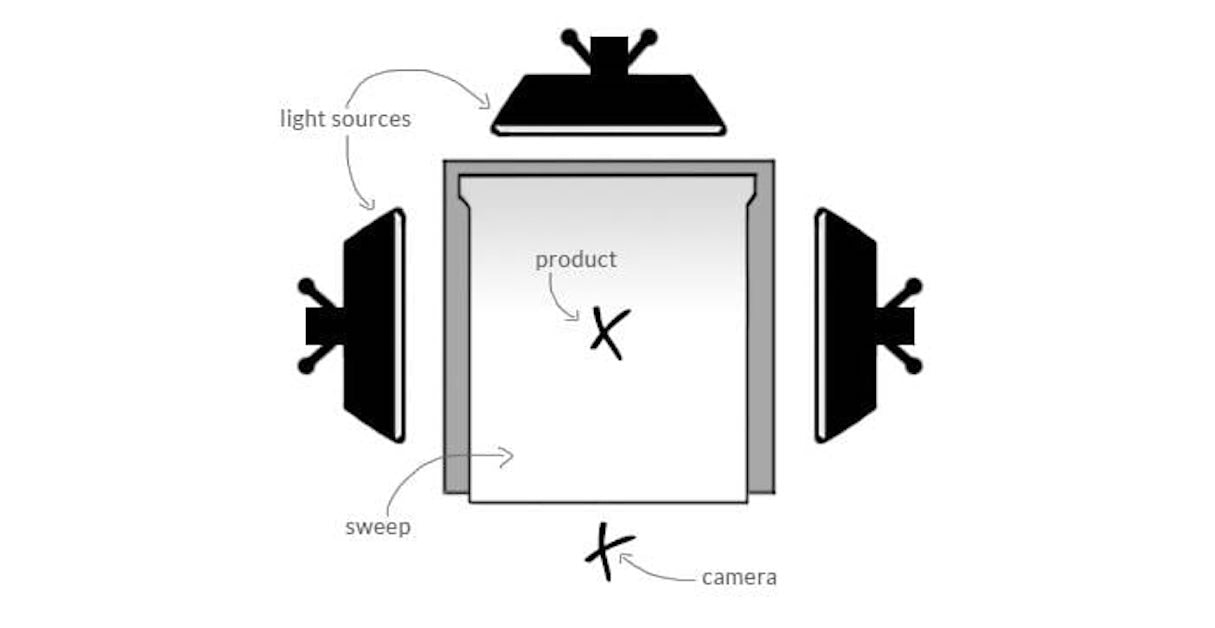
As to the kind of lighting you use, this will heavily depend on your budget. You can buy full studio lighting kits, or you can create your own setup using clamp lamps, spring clamps, and something to hold them up with.
You need to make sure that all your light sources are the same colour so as to not confuse your camera’s white balance calibration, and as with natural lighting, you’ll need to diffuse the light sources. If you’re buying professional studio lights, buy ones that come with umbrella reflectors or softboxes. If you’re using other lights, cover them with something thin and translucent.
Tip 4: Steady your camera
This simple step is often overlooked by ecommerce store owners. For track-sharp images, you’ll need to use a tripod or smartphone mount. Even the steadiest of hands can’t produce blur-free images when you’re shooting with slow shutter speeds. Although more expensive tripods are generally sturdier, you don’t need to splurge on a tripod if you’re only using it for product photography — grab a cheap one off eBay or Amazon.
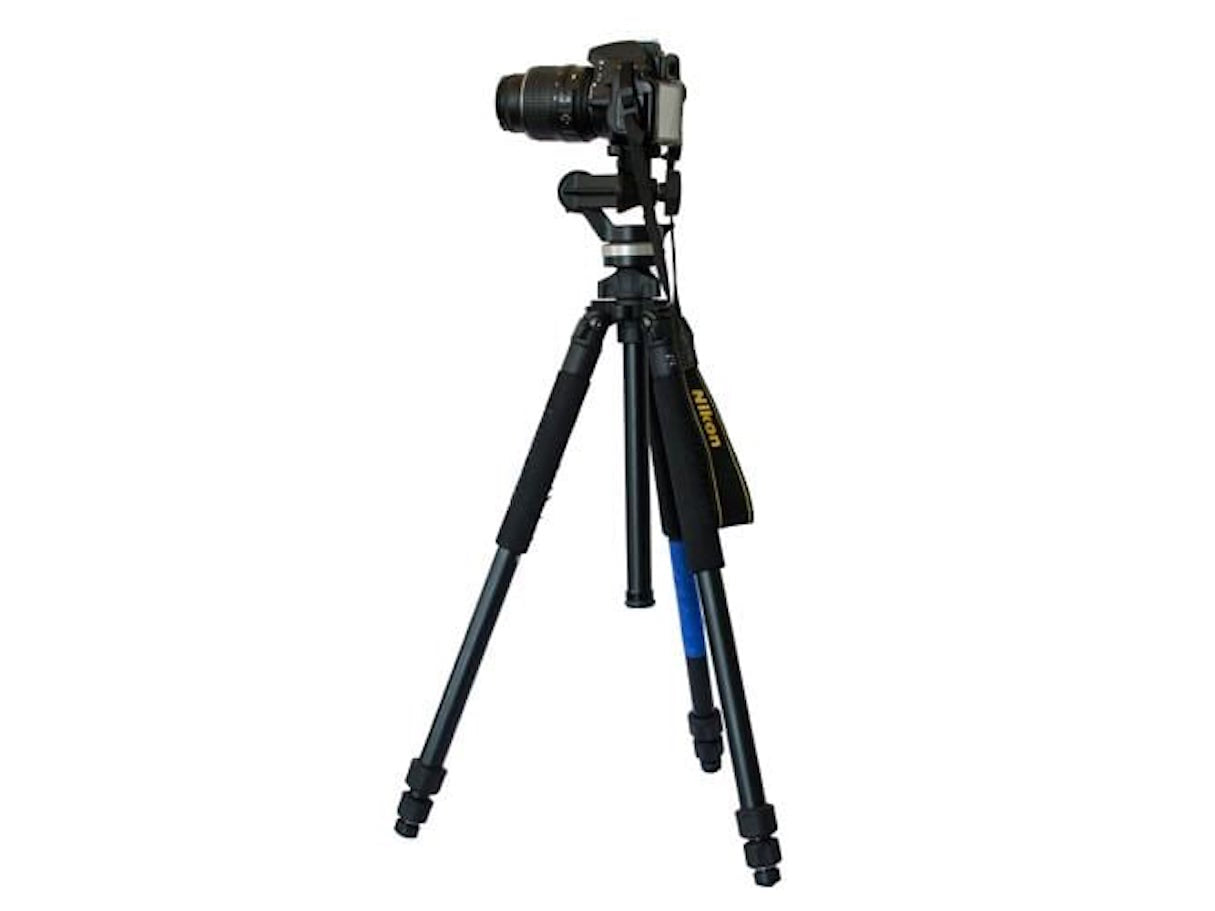
You should position the camera so that the entire sweep fills the frame, and that the product takes up a significant amount of the shot. This is so that when you crop the photo later, the product on its own is large. If you find that your product is too small within the frame, move the tripod closer to the product, or if you’re using a DSLR, use the optical zoom. Avoid using the digital zoom (on both DSLRs and smartphones), as this crops the photo in the process of taking it, which will decrease the quality of the original shot.
If you don’t have a tripod, steady your camera on any hard, stable, and even surface for the same effect — it’ll just be harder to adjust.
When you’re happy with your setup and frame, you’re good to go! I’d recommend using a two-second timer when you press down on the shutter. This will give the camera enough time to restabilize after you’ve applied downward pressure.
Product photography is actually really easy when you know what you’re doing, so why not give it a go? It’s such an easy way to expand your service offerings to your Shopify client. If you have any questions at all, ask away in the comments or drop us a message!
Read more
- 5 Reasons Why App Integrations Benefit Ecommerce Websites
- Customer Obsession: Driving Client Decisions the Amazon Way
- Grow Your Business With This Free Book
- Email Deliverability: 5 Ways to Build a Strong Sender Reputation
- 3 Ways to Use a Phone Number to Boost Your Client’s Business
- Learning How to Code, the Long Way Around
- What You Missed at Generate Conference 2014
- How to Collect the Right Information from Your Clients
- Learn from the Shopify Experts Who Won Build A Business
- 4 Key Ways to Differentiate Your Clients’ Ecommerce Stores From the Competition
You might also like: 7 Handy Websites for Free Stock Videos.

